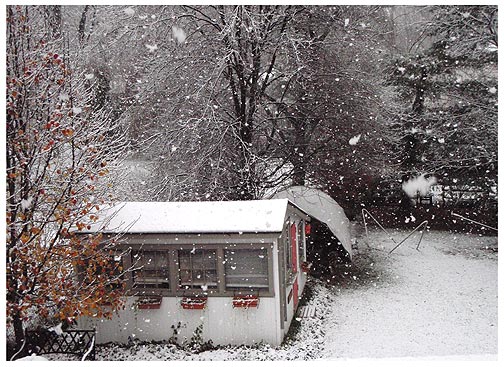
I think the job this weekend is keeping the hoop haus free of 2-4 inches of wet snow...not exactly a day for tabbing in more cockpit stuff.
11.22.09....Bulb From Hell
 Somewhere, on the class site or the yahoo group or SA, I dunno where, frankly, there's a thread by some of the more advanced builders on "knowing what you know now, what would you do differently if you could do it all over again?"
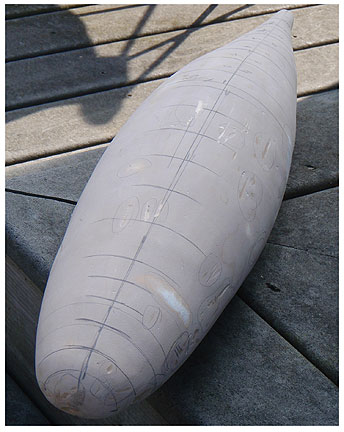
I can say unequivocally that "I'd a be a sheetload more careful when I cut the foam and glued up a skeleton for the Bulb From Hell."
Maybe I'm being a little too anal on this S.O.B., but the stupid thing is eating up man-hours like a State Roads crew on Quaaludes.
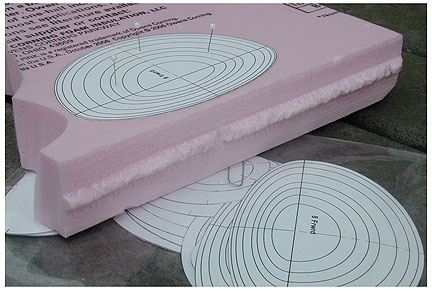
I think I'm finally getting close to a decent (read: symmetrical) shape, but it's only by being extremely methodical and ridiculously exacting that I'm to a point where I'd actually use it as a plug. A set of templates that are dimensionally stable and fairly exact are a huge part of doing it right the first time or, if necessary, making amends the 2nd or 3rd or 4th time.

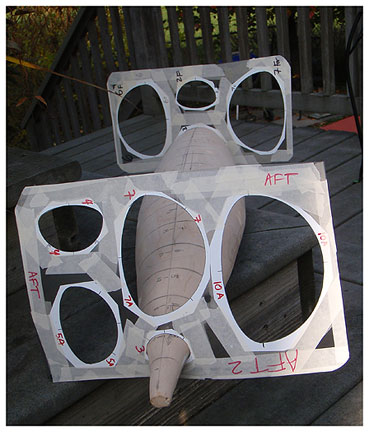
This is basically just some paper templates from the pdf file (increased 131 percent) and printed on some fairly heavy coated stock (paper) and then spray glued to some old autoradiography (x-ray) film, then cut out VERY CAREFULLY with some damn sharp scissors. It's important to mark the centerlines of each of the holes, because just a degree or two of "twist: away from the centerline at each section results in some godawful ugly bulb shapes...I was pretty casual about lining these up the first time and man do I regret that!

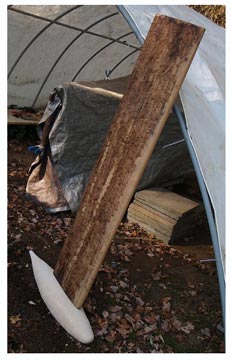
Things are definitely at the point where working inside is the only option. I hung the keel foil up to be glassed over the T-give Holiday. The plan is:
- heat the oak foil for an hour or two with a big space heater to get it warm.
- wipe generously with MEK.
- wet out some e-glass cloth and apply
- let cure and clean off the blush
- wrap a 3" section of carbon foil tape along the length of the foil on both sides in the slight depression (barely discernable in picture at left) and let cure.
- follow up with another layer of 9 oz E uni.
- Then: cast the bulb
All-in-all, a great winter project. Just hope it don't snow.....
11.16.09...Weather Window
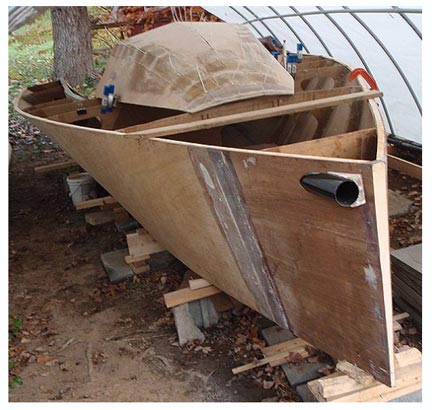
 Temps up into the high 60's in November are Nature's Way of saying, "Get your rear-end in gear," so a little bit happened yesterday. A big butt- joint, that turned out well, got the cockpit sole dry-fitted and ready (pretty much) to go ahead and glass in everything aft of the coach roof. Given another warm day or two, the rear end of the boat could be solid and ready to skin with E-glass cloth by New Year's.
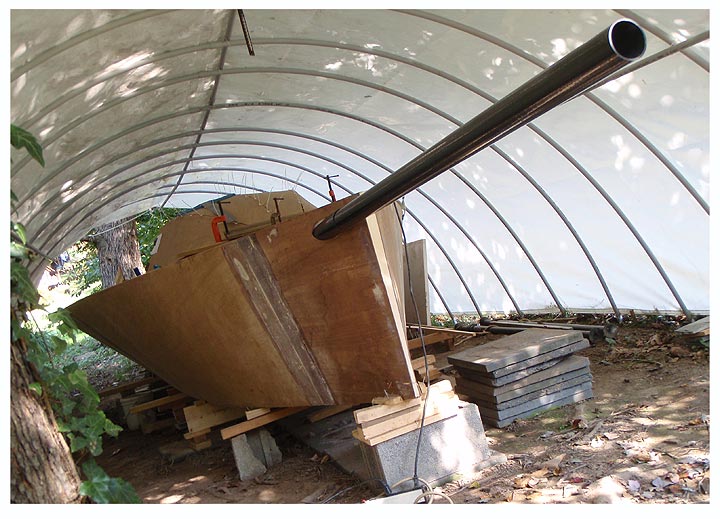
Also, a little glass went on the coach roof and a few more cable ties went into the garbage bin. The coach roof can come inside for the winter and be finished in the (relative warmth) of the basement. Yet another piece of the puzzle to be popped into place when spring rolls around...or even sooner if it's a warm winter (come on Al Gore, bring it to me, hombre). The prod receiver tube was also fitted in...it's just some 6mm meranti glued together and reinforced with 6 oz uni.
Another inside project/goal, over the next couple of months, is to emerge in February (or earlier) with a set of foils that are done and ready to fit right on the boat.
So, the fugly parts need some serious attention. I was not impressed, at all, with how the keel foil templates were fitting the oak laminate, so I wailed on that puppy for an hour or two with an angle grinder (with a very aggressive disk), and came out of that ordeal pretty happy with the new sections!
I've also been hating the shape of the bulb, so I layed on a thick layer (1/8th to 1/4 inch) of pox and 410 microballoons to have another go at shaping the thing closer to the bulb templates. I made some nifty new bulb templates today at lunch, by laminating the the sections on to some old, discarded autoradiography film and cutting them out extremely carefully. These will be a huge improvement over the piece-of-crap paper ones I used the first, 2nd and 3rd time around.
10.21.09........Club Sisyphus
 I saw this on Sailing Anarchy the other day and knew I'd never be happy with a sharp-edged cockpit. So I decided to rip out the holey beams and switch to coosa-composite laminates. I figure the coosa should give me 3 inches or so to play with radius-ing the transition between the coaming and the deck. Not quite sure of the geometry yet, and how the complex curve of the sides (in some places, like forward) is going to connect with the coosa and deck, butI'll do some drawings and figure it out.
I hate ripping stuff out, but I hate finishing a project wishing I'd done so-and-so, instead, so while this is a pain in the butt, I think it's going to be worth it.
No way I'll get as much curve as this little Farr 25 design (looks like a Mumm/Farr 30 transom) but at least it will not be a knife sharp shin buster like I was planning on living with up until a few days ago.
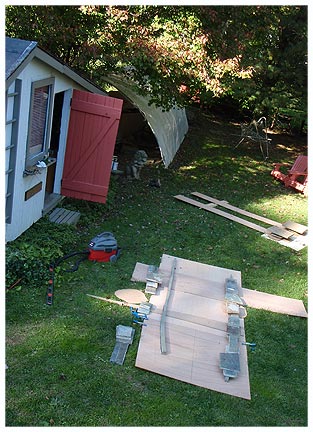
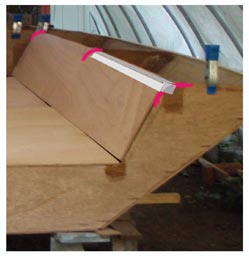
A shot oddly reminiscent of one taken over a year ago (10.13.08) butt joints being laid up in the backyard again. This time it's the butt joints for the cockpit sides (rear), along with some coosa being laminated in a curve to match the cockpit design.
The holey beam has to go, but thankfully, there's not much glass holding it in. Then the frame needs a big notch for the coosa laminate to fit.
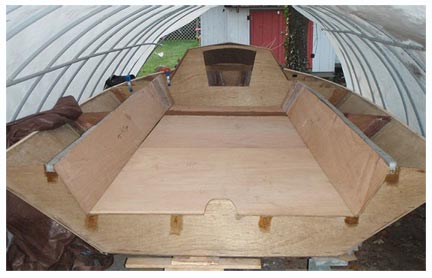
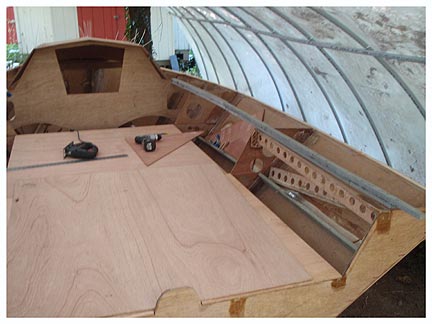
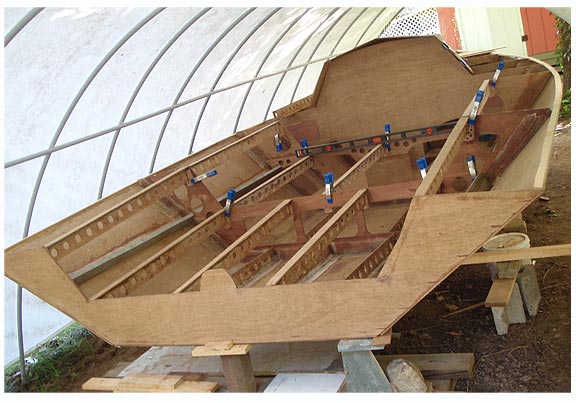
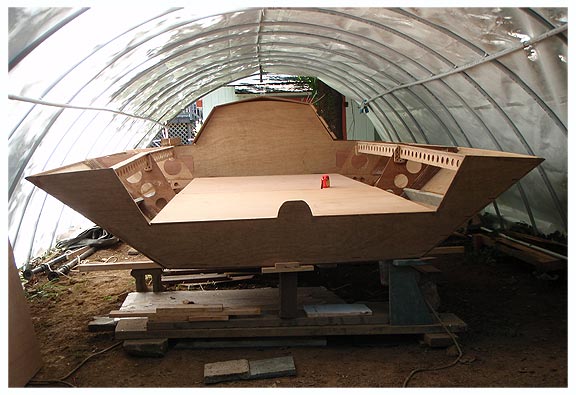
Here's the cockpit with the butt-jointed sides and the coosa fitted in the frames. My big disappointment with the day was not having time to do the butt-joint for the floor....the whole cockpit is 8'10" long, so a single sheet of most material, coosa included, is not going to do it for the cockpit layout...I guess that's one advantage to building the long house/short cockpit version.
So, one step forward, two steps back. Work goes on. I also did a lot of glassing the seams of the house...it is starting to look pretty cool.
10.13.09....Prod Uctivity
One good thing about working on Saturday is you don't feel that guilty about taking off the following Tuesday. At least, I didn't.
Aside from getting the filters changed on our two furnaces (it's getting cold in B'more), I was also able to take advantage of some terrific mid-October weather to get my carbon fiber bowsprit seated.
No one, to my knowledge, has written a detailed description of how they installed their prod, so here's mine. Take it for what it's worth, the whole thing was a helluva lot easier than I thought it would be, but it took some ingenuity...the end result was that the thing is exactly where I wanted it to be.
Cheers to Kevin, of "Pipedream" fame, for the excellent, detailed drawings he provided.
10.11.09.....Back to the Old Grind
 Not having a finished keel foil is starting to retard my progress.
It's a cascading effect....I can't build the keelbox, and keel sleeve, without a fairly decent approximation (read: exact knowledge) of the outside dimension of the foil, once it's glassed and faired and painted (see Kevin's Oct. 6th blog entry). And I cannot glass in the bunks, and finish up below, until the keelbox goes in. And I have to completely figure out how the foil is going to intergrate with the extended cockpit version because, originally, I was going to build a short cockpit version (actually, I ordered a short cockpit, but received a long cockpit version, which was fine because shortly after I ordered the short cockpit version, I changed my mind, and then, somehow, Tim Reiter read my mind and sent me the version I wanted: long cockpit) and so to make a poorly constructed, run-on sentence shorter, I built the stupid keel foil for the short cockpit, and then received shipment of the long cockpit kit, which means the keel's a bit short, but I intend to adapt it and use it anyway.
I had to work all day Saturday, but this morning I got out my grinder and had at it. The foil was lumpy in places and needed a lot more shaping to the get the template to slide from top to bottom, unconstricted. I'm happy to report that now the entire length of the foil can be spanned in close approximation to the template(s). The hollow spots I'll fill in with something easier to fair than white oak. White oak is an absolute horror to fair in large surface area mode.
Next I'm looking into some CF tape to do a little reinforcing with. There's a bit of a hollow still, about halfway thru the chord length, and I'll probably work that out a bit more exactingly to accomodate a width of 3" CF tape. Then I'll epoxy the CF tape in place, fair it a bit and cover the whole foil in E-glass cloth. Fair it and paint it and then use the top 10-12 inches as the male plug for the guts of the keelbox, e.g., a female receiver in 9 oz biax with West's Graphite additive.


Looks nasty, doesn't it? It's really not as gnarly as the pix look....but it obviously is not smooth. To say that I was agressively using the grinder is an understatement.
Basically, I just got sick of farting around with heavy grit paper and decided to go hog wild with the grinder to get it roughly in confirmation with an NACA0012 foil.
Mission accomplished. Now I just need to make it look pretty!
10.03.09....Sicko
 This god damn upper respiratory infection I have is really starting to screw with my build. I don't feel like messing with fiberglass when I'm already hacking up things that look like they ought to be served on the half shell with cocktail sauce. So, in light of that, the only thing I've been able to do is fart around with the bulb some more (starting to like the shape even though it needs a lot more work) and agonize over how I'm going to do the cockpit.
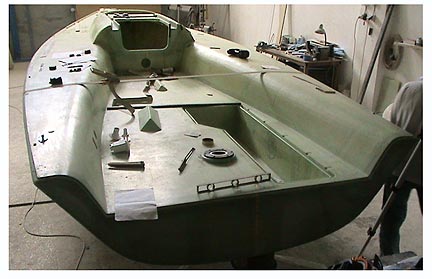
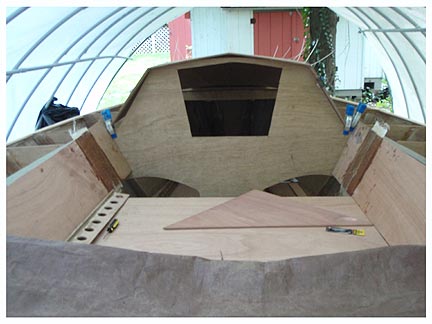
Problem is, I want the sides radius'ed a bit, actually a lot, and the question is how to make the transition from the flat sides to the flat deck, both of which are made from 6mm plywood which doesn't allow you to grind away much material (to radius the angle) before you punch thru to thin air.
So, after giving it a little bit of thought and hounding pro-builder Peter Ross, I finally said screw it and decided I would flesh out the angle with a bunch of lengths of Coosa Composite which would at least give me enough depth to bullnose the angle between the side and the deck. Coosa makes for an amazing substrate to which epoxy/glass can be adhered, and while the stuff isn't quite as rigid as I'd like it to be, it'll be fine with a layer or two of 9 oz cloth laid up on it. We'll see how this goes. Peter Ross is making complex curves with ultra-thin 1/8" Okoume, preflexed and laminated to shapes defined by frames he has constructed, then the thing gets glassed and bagged. I'm way too lazy and unskilled to try something like that, so the inside of this cockpit will not resemble a Melges 24, but it should at least be more comfortable than the configuration in the picture above.
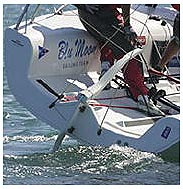
Okay, so it won't be as sexy as a Melges 24, but at least it will be rounded off and the blood circulating to one's feet should be sufficient to the point where amputation will not be necessary...I hope.
Meanwhile, progress continues on the bulb...it's starting to look like something that might actually attach some laminar flow underwater.
09.28.09....Cast System
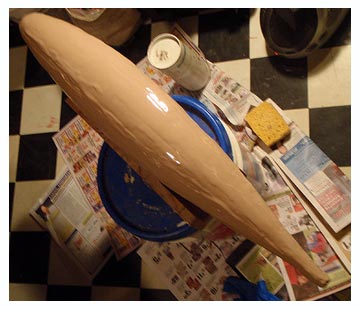
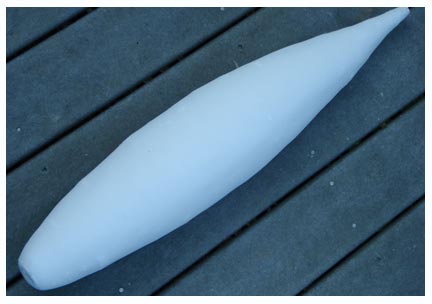
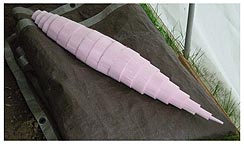 Life keeps conspiring to put me behind schedule...not that I actually HAVE a schedule, but if I did, I'd be behind. This past weekend, I was planning on putting 3 solid days into the build, I mean three days of like ten hours apiece. Wife was going away for 4 days, kids were accounted for elsewhere, I was ready to knock out a lot of work. Then some nasty pathogen got ahold of me and knocked the hell out of all my plans. I dont know if it's H1N1, but I had been exposed to someone who had it about 5 days prior to my getting sick. Working outside was out of the question. Getting out of bed was out of the quesiton. Finally by Sunday afternoon, I felt decent enough (I still feel like crap, actually) to, at the very least, address the issue of my keel bulb, with which I had done nothing since glueing up the pink foam many months ago. I had left it as a sort of lumpy pink mega-reefer, lying out in the build shed and I'd see it now and then and think "I gotta do something with that" and then forget about it for another few weeks. A while back, my buddy Garry of Supermodel fame had given me some advice and some material. The advice was to finish the keel bulb off in plaster and the material was a roll of the stuff they use to make casts, like if you break your arm or something. So Sunday afternoon I cut the plaster cast stuff into strips and wetted it out with a damp sponge and wrapped the pink foam. To my amazement it did an amazing job of conforming to the pink foam, and rounding out some most of the sectional ugliness of the unfaired pink foam. I let it dry (dries quickly) and then went to work with some straight out of the bucket joint compound mud, which is really not the optimal fairing compound, but I had a bucket of it right there and said "why not?"
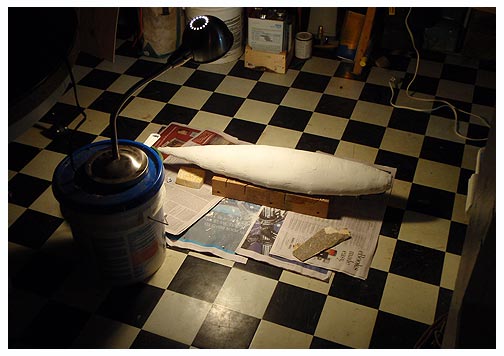
It still has a way to go, but it's one helluva big improvement and a breeze to sand. A few more applications of mud, a bit of sanding, and I'll be close. I'm going to reprint the templates and cut out the insides to use as fairing templates at every other station, just to make sure the thing is still in conformation with the original design. It's been so long, I've actually forgotten where the plug design originated!
09.20.09....Infrastructure
A big buzz word for the new millenium is "infrastructure." Either it's crumbling or some "stimulas" dough has been allocated to build some, or sometimes it's putting a beat down on some community, like Dundalk, this past Friday, when it gives up the ghost entirely.
We felt really bad for the poor folks who took the brunt of the 72 inch water main rupture late Friday afternoon, but it did reinforce the concept that maybe building a boat in your backyard isn't such a bad idea after all!
So with all due respect to the people who's basements were flooded and cars destroyed, we plodded on with the finishing touches to the i550's infrastructure.
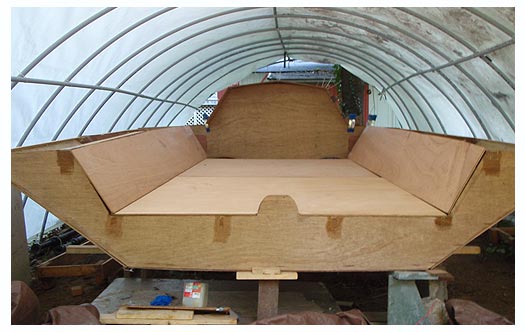
There are now enough holy T-beams to build a cockpit floor, although they are not all completely tabbed in.
I'll go the same route as everyone else, layup the exterior, including the sides, with 6 ox uni tape and then tack it togther, on top, with lathing, then pull the whole thing out and flip it and run 9 oz biax on all the seams underneath.

Even at this stage, I'm loving the size of this cockpit. Uncluttered by a tiller and traveller and bensons, it feels huge, especially for a boat that's just 18 feet LOA.
Earlier stuff on Page 2