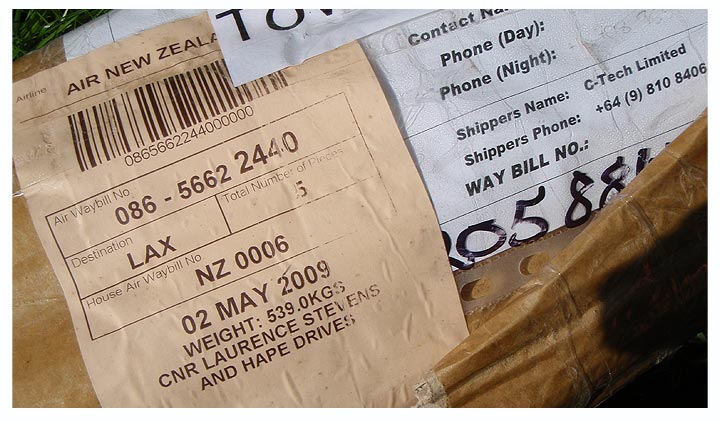
It's been about 5 months since the "ish" arrived from NZ....time to get something done.
Everything in it's Right Place
Where to start:
I posted a note on the i550 forum and got some suggestions. Kevin of Pipedream sent me the .pdf files that pretty much delineate where the thing should go.
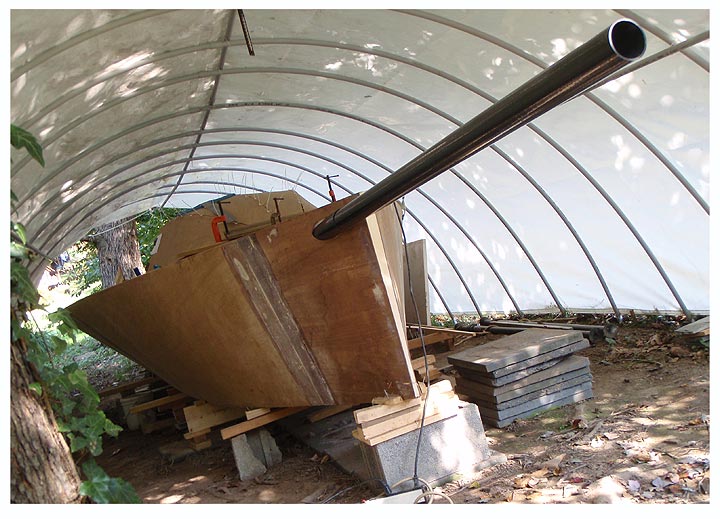
But getting it there and having it point to the sweet spot was something that wasn't going to happen by luck.
One of the biggest challenges, at least to me, was figuring out how to cut into the boat to match the exit profile of a cylindrical tube exiting a diagonal plane.
Peter Ross suggested buying some PVC with an OD similar to the prod receiver tube and cutting it diagonally to see how the angle would present itself to the flat sides.
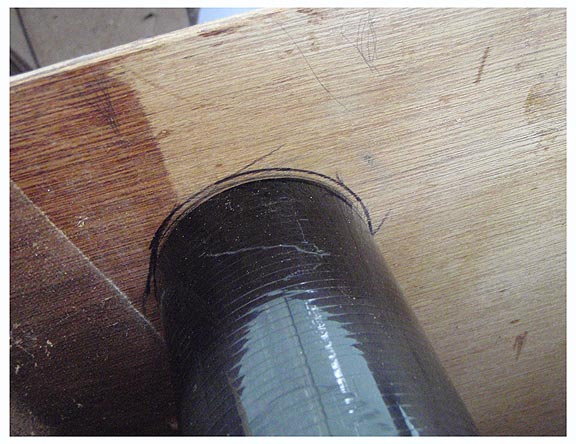
I was too lazy and too cheap to drive to Lowes (boycotting HomeDeputz these days, thanks to the bastards raising the finance rate to a freaking outrageous 27 percent!! EFFFFFF THEM!!!!...talk about usary) and I figured a cardboard tube would work just as well. It did. I rolled up some grotty old construction paper I had and duct taped it into smooth cylindrical-ness. Then, I merely sighted it in some vague approximation of where I figured the end of the prod would be. Then I noted the angle, from above, on the green tube and cut it into shape with scissors. Easy.
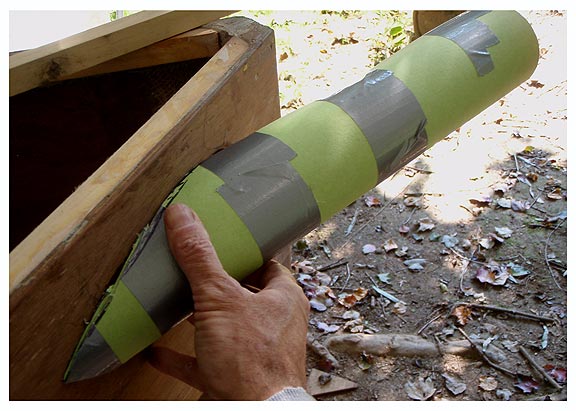
Actually, that's not completely true. I had some left over 1x1 and I extended that out (measuring pretty carefully) to the point approximately where I wanted the tip of the prod to end up. I just eye-balled the green tube to the end of the 1x1. Pretty inaccurately. But no worries. I then took a Sharpie and traced the shape of the green tube flush against the topsides.
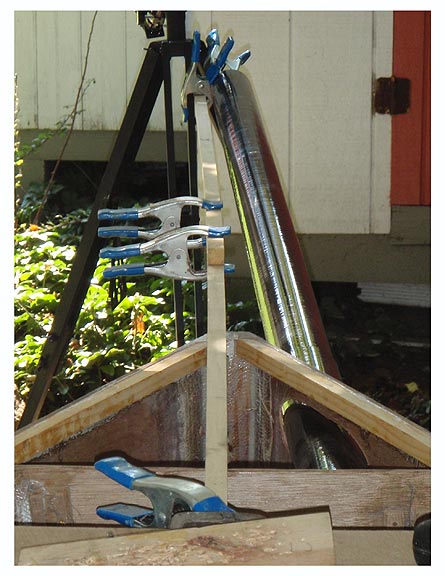
Here's a picture of the 1x1 I ran out. In this shot, it's moved off-center to accomodate the CF prod. To keep the outboard end at the right height (vertical height) I was going to use a tripod, but the kids' telescope was nearby and it was about the right height, so I grabbed it and clamped the 1x1 to it. Worked fine.
Once I had the shape of the tube drawn on the topsides, I drilled a couple of holes close together and made an entry for my jigsaw. Then I purposely cut the shape too small. I wanted to very slowly cut away the topsides so that the tube would just barely fit. Took a lot of small trimming efforts and bevelling the inside and outside edges of the plywood with a half-round bastard was huge. I took my time doing this part but it was not a hassle. Once I could get the tube through the hole, it was a simple matter of cutting or filing away at each end so that gradually I could twist the receiver tube to the point where it was pointed at the end of the 1x1. All I had to do was sight down the receiver tube, eye-balling it, until the end of the 1x1 was exact dead center in sight of the tube.

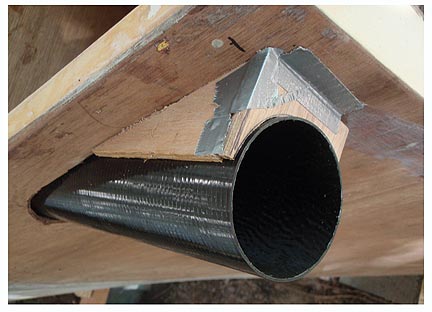
Here's the rough hole. It isn't perfect, but it doesn't have to be. The receiver tube is going to be glassed in to the point where it will be the last thing that ever fails when the boat falls out of use and disintegrates, finally, behind a Wal-Mart somewhere outside of Terre Haute, Indiana.
The accuracy of this hole is not critical. What's critical is the next hole, the hole in Frame 18 that determines exactly where the thing is going to point.
 So, referring to the shot, above, of the 1x1 with the prod clamped to the tripod, I was able to insert the prod into the receiver tube and adjust the tip of the prod to the exact spot, dead centerline and dead on the line of the foredeck, projected 58" forward, by simply adjusting the clamps on the tripod until it sighted up perfectly with some straight-edges. Once that was done, and checked about 15 times, I noted the position on Frame 18 and VERY CAREFULLY traced the end of the receiver tube.
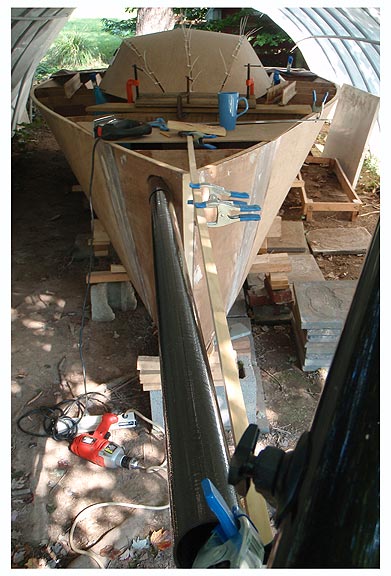
Here's the prod inserted in the receiver sleeve and being tweaked until I got it right. Then the position was traced on Frame 18 (shot above). Having a tripod or something to hold the thing out so that it can be adjusted securely is big.
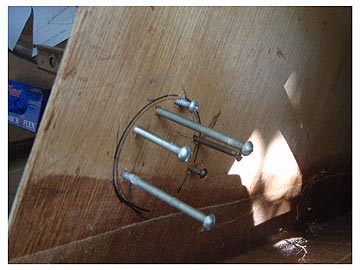 Once the position was traced, the next hurdle was: there's not much room between Frame 18 and the stem, and I don't own a Fein Multitool, so I had to figure out a way to cut out the aft end hole from the other, more open side of Frame 18. So, I drilled a bunch of 1/8" holes around the inner dimension of the circle and threaded some bolts through the holes rather tightly. The bolts stuck thru on the other side pretty accurately and the receiver tube was placed over the projected bolts such that I could then trace the circle on the aft side of Frame 18. Turned out the hole matched perfectly.
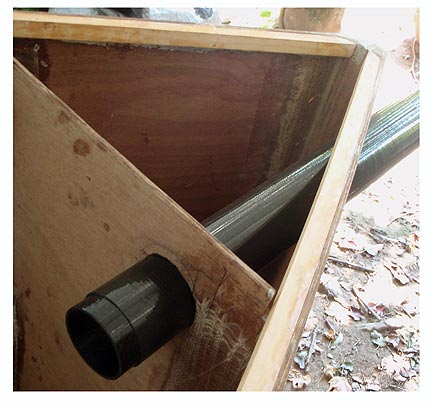
Here's the sleeve set in place with the prod sticking out. Let's see how it all worked out.
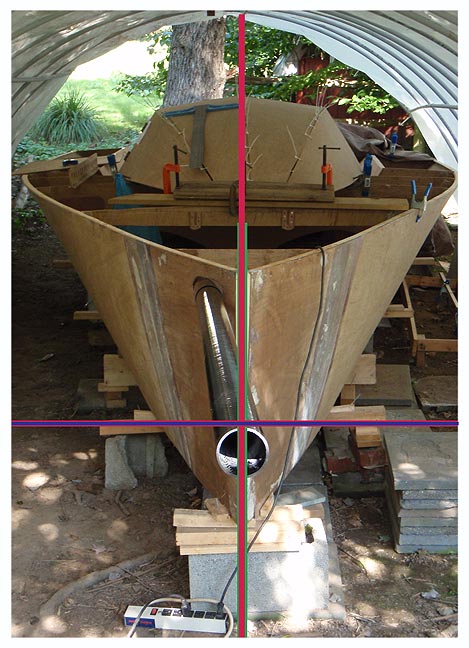 Works for me! The center of the tube is pretty much spot-on the boat's centerline. It's also at about the exact height of the deck line, projected out 58 inches. Close enough!
The next thing is to mock up and build some fairing/reinforcement for the outboard end of the receiever tube. This is just taped together to get an idea of how I will glass the whole deal in. Pretty simple, really....or until someone tells me otherwise!
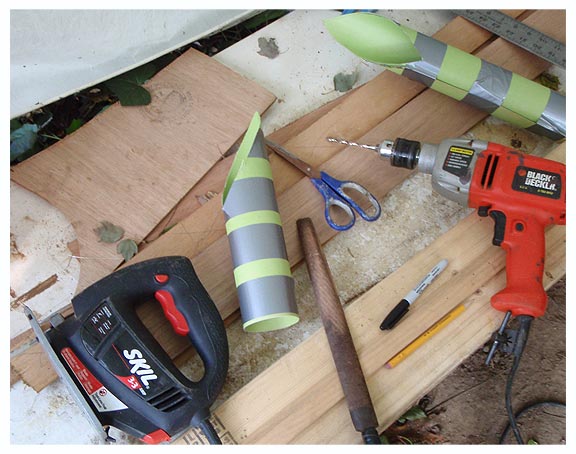 This is pretty much it for the tools I used....nothing special here. Except for the tapered half-round bastard......god I love that file.